Beginner’s Sourdough Bread Recipe: Easy Step-by-Step Guide
There’s something enchanting about baking your own bread, and a Beginner’s Sourdough Bread Recipe is the perfect introduction to this rewarding culinary adventure. With just a handful of simple ingredients and a bit of patience, you can create a loaf with a crisp crust and a tangy, flavorful crumb that will have everyone asking for seconds. What makes sourdough unique is its wild yeast fermentation process, allowing you to experiment with flavor profiles and textures.
As you progress, feel free to play around with variations—try adding seeds for crunch, herbs for aroma, or even fruits for a sweet twist! For the best results, focus on mastering the techniques of folding and shaping your dough, and don’t rush the rising times; patience is key. Whether you are a novice in the kitchen or a seasoned baker looking to explore, this beginner-friendly recipe will guide you towards crafting the perfect sourdough loaf. So, roll up your sleeves and let’s get baking!
Ingredients for Beginner’s Sourdough Bread Recipe:
To create a delicious beginner’s sourdough bread that serves 8–10 people, you’ll need the following ingredients:
Basic Ingredients:
- 500 grams (4 cups) of all-purpose flour: This gives structure and a chewy texture to the bread. For a more robust flavor, consider using bread flour or a blend of whole wheat flour.
- 350 grams (1.5 cups) of water: Use lukewarm water to help activate the sourdough starter and encourage fermentation.
- 100 grams (1/2 cup) of active sourdough starter: Ensure your starter is bubbly and at its peak activity for the best results in flavor and rise.
- 10 grams (2 teaspoons) of salt: Salt enhances flavor and strengthens the gluten structure, contributing to a better texture.
Optional Ingredients for Flavor Variations:
- 30 grams (1/4 cup) of olive oil: Incorporating oil can add moisture and a richer flavor profile to your loaf.
- 1 tablespoon of honey or sugar: For a hint of sweetness, add honey or sugar, which can also aid in browning the crust.
- Herbs and Spices: Consider adding finely chopped fresh herbs such as rosemary or thyme, or spices like garlic powder, for a deliciously flavored bread.
- Seeds or Nuts: Adding seeds (like sunflower, sesame, or poppy) or nuts (like walnuts or pecans) can provide a delightful crunch and additional nutrition.
Alternative Ingredients for Dietary Preferences:
- Gluten-free flour: If you need a gluten-free option, choose a gluten-free flour blend designed for baking. Keep in mind that gluten-free sourdough may require additional binding agents like xanthan gum.
- Whole wheat flour: Swap part of the all-purpose flour for whole wheat flour to increase fiber content and impart a nutty flavor to your bread.
These ingredients combined will yield a tasty, homemade sourdough bread perfect for sharing with family and friends. Customize your bread with personal touches to make it your own!

How to prepare Beginner’s Sourdough Bread Recipe:
Making your first sourdough bread can be an exciting journey. Follow these steps to create a delicious loaf with your own hands.
Step 1: Gather Your Ingredients
Collect the essential ingredients: 500g of all-purpose flour, 350ml of lukewarm water, 100g of active sourdough starter, and 10g of sea salt. Ensure all items are fresh for the best results.
Step 2: Mix the Dough
In a large mixing bowl, combine the flour and water. Stir until there are no dry bits of flour. You should achieve a shaggy dough consistency.
Step 3: Incorporate the Sourdough Starter
Add your active sourdough starter to the dough mixture. Use your hands to knead it in until completely incorporated. The dough will feel sticky at this stage.
Step 4: Add the Salt
Sprinkle the sea salt over the dough. Use a folding technique to mix the salt into the dough. Fold one side of the dough over to the opposite side, rotating the bowl as you go.
Step 5: Autolyse the Dough
Let the dough rest for 30 minutes. This resting period is known as autolyse, which allows the flour to absorb water and gluten to develop.
Step 6: Perform Stretch and Fold
After resting, perform stretch and fold techniques every 30 minutes for a total of four times. Gently grab one side of the dough, stretch it upwards, and fold it into the center. Repeat this around the dough.
Step 7: Bulk Fermentation
Cover the bowl with a damp cloth and let it rise at room temperature for 4 to 6 hours. The dough should double in size and show bubbles on the surface.
Step 8: Shape the Dough
Once the dough has risen, transfer it to a lightly floured surface. Gently shape it into a round loaf. Use your hands to tuck the edges under to create tension on the surface.
Step 9: Final Proofing
Place the dough in a well-floured proofing basket. Cover and let it rise for another 2 to 3 hours, or overnight in the refrigerator for improved flavor.
Step 10: Preheat Your Oven
About 30 minutes before baking, preheat your oven to 450°F (232°C). Place a Dutch oven inside to heat as well.
Step 11: Bake the Bread
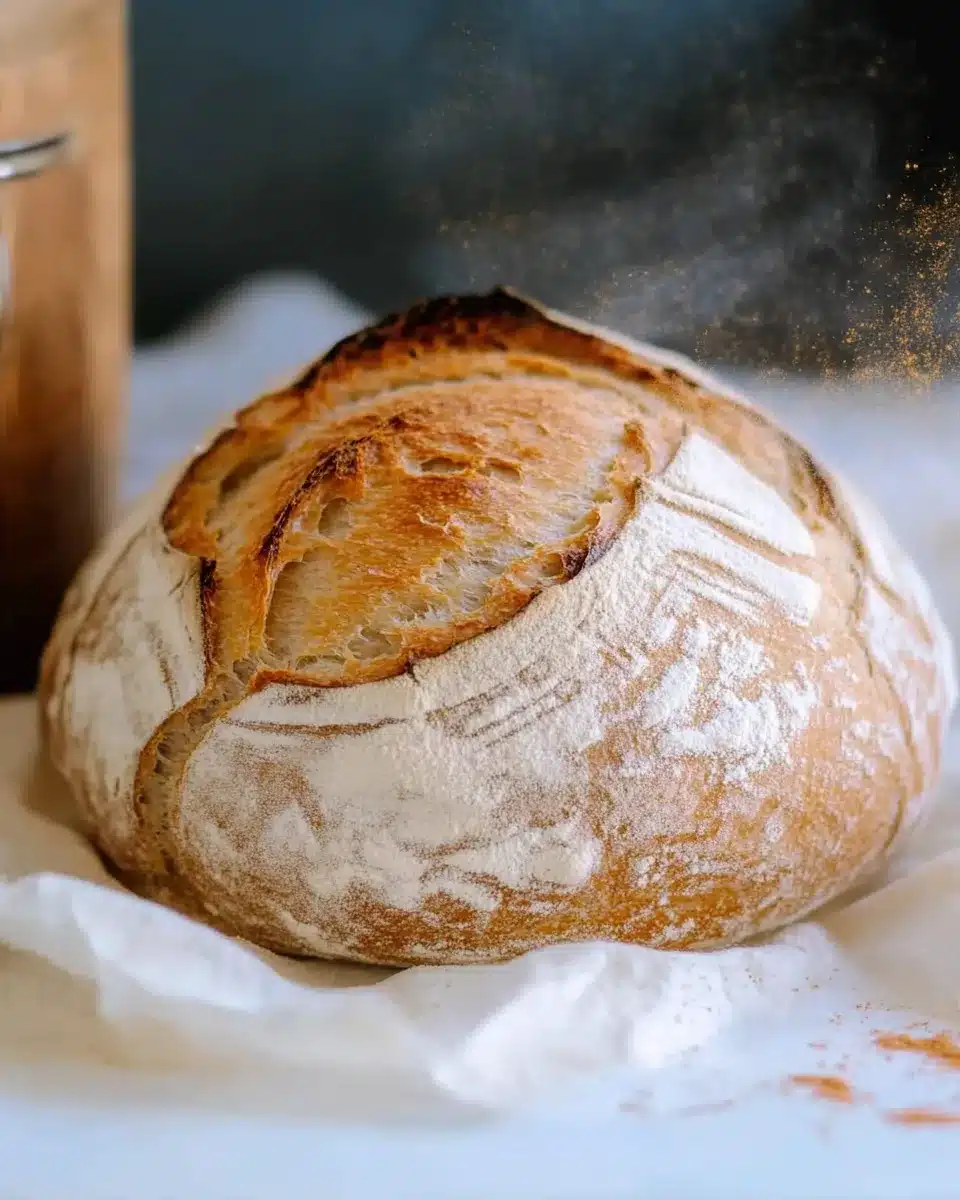
Carefully transfer the dough into the hot Dutch oven. Cover it and bake for 30 minutes. Remove the lid and bake for an additional 15 minutes for a golden crust.
Step 12: Cool and Enjoy
Once baked, let the bread cool on a wire rack for at least 1 hour before slicing. Enjoy your homemade sourdough bread!
Tips for the Perfect Beginner’s Sourdough Bread Recipe
Maintain the Right Temperature
Maintaining the correct temperature is vital when making sourdough. Optimal fermentation occurs around 76°F to 78°F (24°C to 26°C). If your kitchen is colder, consider using an oven with the light on or placing the dough near a warm spot in your home. Conversely, if it’s too hot, the dough may ferment too quickly, leading to poor flavor and texture. Using a thermometer can help monitor the temperature, ensuring consistency throughout the process.
Use Quality Ingredients
Choosing high-quality ingredients significantly impacts the final flavor and texture of the bread. Opt for unbleached all-purpose or bread flour, as these retain essential nutrients that help with fermentation. You can also experiment with organic flour for a richer taste. When selecting water, filtered or bottled water is often best, as tap water may contain chemicals that can hinder yeast activity. Lastly, use a good-quality salt; sea salt or kosher salt can be ideal for enhancing flavor.
Substitutions for Dietary Restrictions
If you have dietary restrictions or preferences, there are suitable substitutions in this sourdough bread recipe. For gluten-free bread, you can use a gluten-free all-purpose flour blend specifically designed for baking. Keep in mind that the texture will differ, so adding xanthan gum can help replicate the chewiness of gluten. If you want a dairy-free version, this recipe is naturally dairy-free. However, if you’d like to enrich the flavor further, consider using a milk alternative in a small amount, such as almond or oat milk.
Additional Ingredients for Flavor
To enhance the flavor profile of your sourdough, consider adding ingredients such as herbs, olives, or cheese. Fresh herbs like rosemary or thyme can elevate the taste beautifully. For a slightly nutty flavor, incorporate seeds like sunflower or pumpkin. Just remember, when adding these ingredients, adjust the flour slightly to maintain the dough’s hydration.
Don’t Rush the Process
Patience is vital when creating the perfect loaf. Allow the dough to rise, shape, and proof fully. Each step plays a crucial role in developing the bread’s flavor and texture. Rushing may result in an underdeveloped loaf. Give yourself time to enjoy each stage of the process, and resultantly, you’ll find that the flavor and texture of the bread improve dramatically.
With these tips, making an exceptional beginner sourdough bread can be an enjoyable and rewarding experience. Happy baking!
Storage Tips for Beginner’s Sourdough Bread Recipe:
Storing your freshly baked sourdough bread properly helps you maintain its flavor and texture. Follow these simple guidelines to enjoy your bread for days to come.
Maintain Freshness with Proper Storage
To keep your sourdough bread fresh, store it in a paper bag. The bag allows the bread to breathe while preventing excess moisture, which can lead to mold. Avoid plastic bags as they trap humidity and cause the crust to become soft. Once you place the bread in the paper bag, consider wrapping it with a clean kitchen towel for added protection.
Optimal Storage Conditions for Sourdough Bread
Store your bread in a cool, dry place, such as a kitchen counter or bread box. Extreme heat or humidity can spoil your bread quickly. If you live in a humid area, try to find a drier spot to store your loaf. Keep it away from direct sunlight, as light can accelerate spoilage.
Longer Shelf Life Tips
If you need to keep the bread for more than a few days, freezing is your best option. Slice the bread into individual servings before you freeze it. This way, you can take out only what you need. Wrap each slice tightly in plastic wrap, then place the slices in a resealable freezer bag. Label the bag with the date, and your bread can last for up to three months in the freezer.
Thawing and Reheating Sourdough Bread
To thaw frozen sourdough, leave the slices at room temperature for about 30 minutes. If you want to enjoy your bread warm, preheat your oven to 350°F (175°C). Place the thawed slices directly on the oven rack for about 5 to 10 minutes until they crisp up again. This process restores the crust and warms the bread nicely.
Avoiding Common Mistakes in Storage
Do not store your bread in the fridge unless you live in an extremely humid environment. The coldness of the fridge can make your bread stale faster. Always check your bread for any signs of mold, especially if you leave it out for an extended period. If you notice any, discard it immediately to prevent food waste.
By following these storage tips, you can enjoy your homemade bread longer and keep its delightful flavor intact.
Related Recipes
If you enjoy making a Beginner’s Sourdough Bread Recipe, you will love exploring these related recipes. Each one pairs well with the flavors and textures of sourdough, bringing variety to your baking routine.
First, consider making Herb Focaccia. This Italian flatbread rises beautifully and has a unique, chewy crust. The addition of fresh herbs enhances the taste, making it a flavorful side or base for sandwiches. Focaccia’s fluffy interior complements the tangy notes of sourdough, and it’s just as approachable for novice bakers.
Next, try your hand at No-Knead Rustic Bread. This recipe requires little effort, yet the result is incredible. The bread develops a crisp crust and the same airy crumb structure found in sourdough. The long fermentation time allows for the development of complex flavors, similar to those in the sourdough process.
Finally, whip up some Savory Scones. These delightful baked goods can include cheese, bacon, or even herbs. The flaky texture of scones contrasts nicely with the denser nature of sourdough. Pair them with soup or serve them at brunch for a delicious twist that highlights your sourdough skills.
These recipes not only enhance your bread-making repertoire but also help you appreciate the wonderful world of fermentation and flavor. Each recipe stands out while maintaining a connection to the beginner’s sourdough experience, ensuring your baking adventures remain exciting and delicious. Enjoy your cooking!
Frequently Asked Questions:
What is the best flour to use for a beginner’s sourdough bread?
When embarking on your journey with a simple sourdough bread recipe, opting for high-protein all-purpose flour is recommended. It provides the right balance for strong gluten development, leading to a better texture in your finished loaf. Whole wheat flour can also add flavor and nutritional value, but using a blend of both can yield excellent results as you gain confidence.
How long does it take to make sourdough bread from start to finish?
Typically, a basic sourdough bread recipe requires around 24 to 48 hours from start to finish. This includes time for the sourdough starter to ferment, proof the dough, and bake the bread. Keep in mind that while some of this time involves no active participation, proper planning is key for managing the bread-making schedule.
Do I need a sourdough starter to make sourdough bread?
Yes, a sourdough starter is essential for creating the unique tangy flavor and structure associated with this type of bread. The starter consists of flour and water fermented by wild yeasts and bacteria. You can either create your own starter at home or source one from a fellow baker, making the beginner’s sourdough bread experience achievable even for those with limited background.
What equipment do I need to make sourdough bread efficiently?
To successfully prepare sourdough, having a few basic tools on hand is ideal. A large mixing bowl, a bench scraper, a digital kitchen scale for accurate measurements, a loaf pan or Dutch oven for baking, and a kitchen thermometer to check dough temperature are essential. This collection of equipment will simplify the process and yield better results.
Is it possible to make sourdough bread without a kitchen scale?
While a kitchen scale is highly recommended for precise measurements, it is still possible to make sourdough using measuring cups. However, relying on volume measurements can lead to inconsistencies in your dough, affecting texture and taste. If you’re serious about baking artisan bread, investing in a scale is a wise choice.
How can I tell if my sourdough bread is ready to be baked?
Knowing when your dough has properly risen is crucial. Perform the “poke test” by gently pressing your finger into the dough. If the indentation springs back slowly, your bread is ready. If it doesn’t spring back at all, it may be over-proofed, and if it springs back quickly, it likely needs more time. Mastering this technique will enhance your skills as you perfect your sourdough endeavors.
Conclusion:
In wrapping up this Beginner’s Sourdough Bread Recipe, it’s important to emphasize its accessibility and ease of preparation. With just a few basic ingredients—flour, water, salt, and your sourdough starter—you can craft delicious bread at home. Flexibility is a hallmark of this recipe; feel free to experiment with different flours or add-ins like herbs, nuts, or seeds to suit your taste. Additionally, this method allows for customization based on your schedule, accommodating both long fermentation processes and quicker options. Remember, practice makes perfect, and each loaf you bake contributes to your skills and knowledge. So roll up your sleeves, embrace the art of sourdough, and enjoy the rewarding journey of homemade baking! Whether you’re a novice or an experienced cook, this beginner-friendly recipe is sure to inspire. Happy baking!